

The French tip pedicure is back as one of this summer’s biggest nail trends, combining timeless elegance with modern versatility. It is essentially the toenail version of the classic French manicure: nails are painted with a pale pink or nude base and accented by a crisp white stripe across each tip. This style gained popularity decades ago for its ability to make nails look clean, groomed, and chic with any outfit. Despite its name, the French pedicure was popularized in 1970s Hollywood by a celebrity manicurist looking for a neutral look that would suit every costume change on set. Today, nail experts agree that the French pedicure remains a timeless choice, and it’s even enjoying a resurgence in popularity as clients gravitate toward a more subtle, neutral take on the classic
The French tip pedicure is back as one of this summer’s biggest nail trends, combining timeless elegance with modern versatility. It is essentially the toenail version of the classic French manicure: nails are painted with a pale pink or nude base and accented with a crisp white stripe at the tip. This style gained popularity decades ago for its ability to make nails look clean, groomed, and chic with any outfit. Despite its name, the French pedicure was popularized in 1970s Hollywood by a celebrity manicurist looking for a neutral look that would suit every costume change on set. Today, nail experts agree that the French pedicure remains a timeless choice, and it’s even enjoying a resurgence in popularity as clients gravitate toward a more subtle, neutral take on the classic pink-and-white look.
What Is a French Pedicure?
A French pedicure is a style of polishing and finishing the toenails characterized by a natural-looking base color with a distinct white tip. In a white French pedicure, the nail plate is typically painted a sheer nude, pale pink, or clear shade to resemble the natural nail bed, and a thin, opaque white line is applied across the tip of each toenail. The result is a clean and refined look that enhances the appearance of your feet without being overly flashy. This approach to polishing toes became iconic because it’s universally flattering and matches any outfit or occasion.
French pedicure designs were traditionally straightforward, just the white stripe and neutral base, but over the years, the style has evolved. People have introduced creative twists, such as using different colors for the tips, incorporating small art elements, or adjusting the thickness of the tip stripe. The origin of the term “French” is a bit of a misnomer; the style did not actually originate in France. It was famously named in the 1970s when Hollywood film stylists sought a versatile nail look, and it quickly gained worldwide popularity for its chic, minimalist appeal. Today’s French pedicure can be as classic or as modern as you like. Nail technicians report that, while the look is timeless, many clients now prefer natural French pedicure styles, such as the “micro French,” over the old-school opaque pink base with a thick white line.
French pedicure designs were traditionally straightforward, just the white stripe and neutral base, but over the years, the style has evolved. People have introduced creative twists, such as using different colors for the tips, incorporating small art elements, or adjusting the thickness of the tip stripe. The origin of the term “French” is a bit of a misnomer; the style did not actually originate in France. It was famously named in the 1970s when Hollywood film stylists sought a versatile nail look, and it quickly gained worldwide popularity for its chic, minimalist appeal. Today’s French pedicure can be as classic or as modern as you like. Nail technicians report that, while the look is timeless, many clients now prefer natural French pedicure styles, such as the “micro French,” over the old-school opaque pink base with a thick white line.
This style has practical advantages. Because the colors used are neutral and close to natural skin tones, a French pedicure tends to make feet appear clean and well-groomed without drawing too much attention. It’s versatile for any setting (beach, office, wedding, etc.), and chips or growth at the nail base are less noticeable than with bold-colored polish. You can easily freshen it up at home by touching up the white tips or adding a new top coat, extending the life of your pedicure between salon visits.
The Best Tools for French Pedicure Success
Before you begin painting those perfect white tips, it’s important to gather all the necessary tools and supplies. Having the right pedicure tools on hand will ensure you can achieve a salon-quality result. The best tools for French pedicure preparation and polish include both general pedicure supplies and a few specialized items for creating the French tip effect. Here’s what you’ll need:
- Nail Clippers and File: Start with basic nail grooming tools. A good pair of toenail clippers will let you trim nails to your desired length. Follow up with a nail file to smooth the edges. French pedicures typically look neatest on nails that are uniformly shaped, often a soft square or squoval shape across the toes.
- Cuticle Stick or Pusher: A wooden orange stick or a metal cuticle pusher helps gently push back excess cuticle skin around the nails. Neat cuticles are essential for a clean appearance. You may also want a cuticle trimmer to carefully snip any hangnails or dead skin, but be very gentle to avoid cuts.
- Buffer Block: A fine-grit nail buffer can smooth the surface of each toenail. Lightly buffing helps remove ridges and gives the polish an even surface to adhere to. Don’t over-buff (to avoid thinning the nails) – just a few swipes to even things out and add a slight shine.
- Foot Soak and Exfoliation Tools: Though not specific to the polish style, a proper pedicure involves caring for the feet. A basin for soaking your feet in warm, soapy water (or a foot bath) is great for softening your skin. A foot file or pumice stone is helpful in exfoliating rough heels and calluses after soaking. This preps your feet so they feel as smooth and pampered as they’ll look.
- Toe Separators: These foam or gel separators fit between your toes to keep them apart while polishing. They prevent your freshly painted toes from smudging each other. If you don’t have dedicated toe separator tools, you can improvise with twisted paper towels or cotton balls between toes.
- Base Coat and Top Coat: These clear polishes are essential for any professional-looking pedicure. A base coat goes on first to smooth the nail surface and help the color adhere better. A top coat goes on last to seal in the polish, add shine, and protect from chipping. Using quality base and top coats will significantly extend the life of your French pedi.
- Sheer Nude or Pink Polish: For the classic French look, you’ll need a polish that serves as the base color on your toenails. Typically, a sheer pale pink, a nude beige, or even a clear polish is used. This color should be subtle and close to your natural nail tone. It gives that clean, healthy look to the nail bed under the white tip.
- Opaque White Polish: The star of the French pedicure is the white tip, so a high-opacity white nail polish is needed. Many brands make specific “French tip white” lacquers that are bright white and designed to paint on in one coat. You want a polish that will create a solid white line in a single smooth stroke, if possible.
- French Manicure Brush or Pen: While not strictly required, having a fine-tipped brush can be a game-changer for painting neat white lines. A French manicure brush is a small detail brush with a flat or slightly curved edge that helps you draw the smile line (the curved white tip) accurately. There are also white French toe polish pens and markers on the market that some people use to literally draw the tip on. These tools can make achieving an even arc much easier, especially if you’re not very steady-handed.
- Guide Strips or Nail Tape: Another handy tool for beginners is French manicure guide strips or a strip of thin nail tape. You place these on the nail to mask off everything except the tip area; then you paint the exposed tip white and peel away the guide to reveal a crisp line. If freehand painting seems daunting, guide stickers are an easy workaround.
- Polish Remover and Cotton Swabs: Keep nail polish remover nearby with some cotton swabs or a small brush for cleanup. Even pros can slip up when painting the tiny tip lines, so having remover allows you to tidy up any mistakes. A dappen dish (small glass dish) can hold a bit of remover to dip a brush in for precision cleanup. Also, have paper towels or a clean cloth to protect your surface and wipe brushes.
Assembling these tools before you start will set you up for success. A traditional French pedicure typically requires a base coat, top coat, white polish, a detail brush, plus basic supplies like polish remover and towels. With the right tools at hand, you’ll find it much easier to get French pedi results that rival a professional job.
Ready to book your next appointment?
Book NowHow to Do a French Pedicure at Home (Step-by-Step)
Ready to pamper yourself with a DIY French pedicure? Doing your own French pedi might seem intricate, but it’s absolutely achievable with a bit of patience and the proper technique. The key is to take your time with prep work and each layer of polish. Below is a step-by-step French pedicure guide to help you buff, scrub, and paint like a pro:
- Prep Your Feet and Nails: Start by removing any old polish from your toenails. Trim your toenails straight across using clippers, then file them to smooth edges and shape as desired. Shape each nail before soaking, since nails are easier to file when dry. Once your nails are shaped, give your feet a soak in warm water for 5–10 minutes – you can add a bit of gentle soap or a foot soak product to soften your skin. After soaking, gently pat your feet dry and use a foot file or pumice stone to remove any dry, rough skin on your heels or the balls of your feet. Next, apply cuticle remover or oil to the edges of your toenails and gently push back the cuticles with a cuticle stick. Trim any excess dead cuticle skin if necessary. This meticulous skin and nail prep lays the foundation for a smooth pedicure. Wipe each nail clean of oils so that your base coat will adhere well. Make sure your feet and nails are dry before moving to the next step.
- Give Your Feet Some TLC: A French pedicure might be focused on the nails, but don’t neglect the rest of your feet. Part of what makes a pedicure feel luxurious is the foot care. If you haven’t already exfoliated during the soak, now’s a good time to use a scrub on your feet and lower legs. Massage a foot scrub or gentle body scrub in circular motions, focusing on rough areas, to buff away dead skin. Rinse and dry your feet. Then apply a rich foot cream or moisturizer and massage it in, focusing on your heels, soles, and cuticles. This step will leave your skin soft and supple – a perfect canvas for showing off your new pedicure. If you want the full salon experience, you can also take a moment to wrap a warm towel around your feet after moisturizing or do a quick foot massage.
- Apply Base Coat and Base Color: Now it’s time to start painting. Place toe separators between your toes to keep them apart. Apply a thin layer of base coat polish to each toenail. The base coat is like a primer; it creates a smooth surface and helps the colored polish stick better and last longer. Let the base coat dry for a minute or two. Next, apply your sheet color, the sheer pink or nude base polish that gives the French pedicure its subtle tint. Start with a thin coat of your chosen neutral color on each nail. If it’s very sheer, you might not see much difference on the first coat, which is fine. Allow that first coat to dry for 1–2 minutes, then apply a second thin coat of the sheer polish. Two coats typically build up just enough color to look clean and slightly glossy, while still mostly transparent, so the whites will pop. The base color should complement your natural nail bed, essentially just enhancing the natural look of your nails. After two coats, your toenails will have a healthy-looking pinkish or nude hue. Let them dry for a few minutes.
- Paint the French White Tips: This is the defining step of a French pedicure. Adding the white tip, known as the smile line. Determine the desired thickness or width of the white stripe. For a modern, delicate look, you might paint a very thin line (micro-French); for a more traditional look, a moderate thickness is standard. Now, to actually create the line, you have a couple of options:
- Freehand Method: If you have a steady hand, load a small amount of opaque white polish on a fine brush. You can use the brush that comes with the polish, but it may be too wide for small toes – a separate thin nail art brush often helps. Starting at one side of the nail tip, carefully swipe the white polish across the tip in a smooth arc following the natural curve of your nail. Some find it helpful to anchor their painting hand by resting it on a table and to paint with a series of short strokes if a single long stroke is difficult. Aim to cover just the tip of the nail, perhaps about 2–3 millimeters from the edge. Another technique is to dab the brush along the edge of the nail from one side to the other, then fill in towards the edge. Don’t worry if a bit of polish gets on the skin; you can clean it after. The key is to get a neat, curved line. Don’t make the tip too thick, as it can visually shorten the nail and also be more prone to smudging. Let the first coat of white dry for a minute, then assess if it needs a second coat for full coverage. Many white polishes are quite opaque, but if you see streaks, lightly reapply each tip to achieve a solid white color. Keep your layers thin to avoid a chunky look.
- Using Guides or Tape: If freehand painting feels intimidating, use those French tip guide stickers or a piece of thin nail tape. Once your base color is completely dry, apply the curved guide across each nail, a couple of millimeters above the tip, leaving the very end of the nail exposed. This exposed part will become the white tip. Press the stickers down firmly to prevent bleeding. Now paint the tip above the sticker with white polish. You can be a bit more liberal since the sticker defines the line for you.
- Alternate Stamp Method: Another innovative approach some people use is a French tip stamper. This is a silicone stamping tool: you put a dab of white polish on the stamper, then gently press your toe’s tip into it to imprint a perfect curved line. It can produce very consistent smiles, although it may take a few tries to get the pressure just right. If you’re a gadget lover, a French nail stamper is a fun option.
- Finish with Top Coat and Clean-Up: After the white tips have set for a few minutes, it’s time to seal everything in. Gently brush on a clear top coat over each toenail, covering the entire nail and extending slightly over the tip to cap the edge. The top coat will blend the two-tone layers a bit and give a unified shine. It also significantly increases the longevity of your pedicure by protecting against chipping. Avoid putting on shoes or socks until you’re sure the polish is hard. Any pressure can smudge those carefully painted tips. If you must move around, stick to flip-flops.
Don’t get discouraged, even if the result isn’t 100% salon-perfect on your first try, it will still look great at standard viewing distance. With practice, your French pedis will get steadier and faster.
Health, Hygiene, and Suitability
Maintaining strict hygiene during pedicure procedures is essential to prevent infections and protect nail health. Tools should be sanitized between uses, and surfaces kept clean to ensure client safety. A French pedicure is suitable for anyone seeking a polished, elegant look, as its neutral style flatters all skin tones and is appropriate for every occasion. Both women and men can benefit from this classic treatment; for men, the subtle finish provides a clean, well-groomed appearance without looking overly polished. Clients with sensitive skin, diabetes, or specific health needs should inform their technician, as alternative methods, like waterless pedicures, may offer added safety and comfort.
Gel French Pedicure vs. Regular Polish
In a French pedicure with gel, the process of painting the nails is similar (base coat, sheer color, white tips, top coat), but all the polish used is a gel formula that requires curing with a light. After each coat, you place your toes under a UV or LED lamp for about 30-60 seconds to harden (cure) the gel. The result is instantly dry and highly durable. The appearance of a gel French pedi is very glossy, and it tends to resist chips much better than regular polish.
Deciding between a gel French pedi and a regular one depends on your needs. If you have an upcoming beach trip, event, or just prefer not to redo your toes often, gel is worth it for the longevity and no-fuss shine. On the other hand, if you like to change polish colors frequently or want to avoid the hassle of removal, a classic French pedicure with regular polish is still fantastic. It’s also easier to touch up a regular French pedicure at home if it chips; you can quickly dab some white on a tip or add top coat. Some people also avoid gel if they’re concerned about the UV lamp exposure or if their nails are on the drier side. In any case, both versions deliver the same elegant look.
DIY vs Professional: Should You Get French Pedi Service or Do It Yourself?
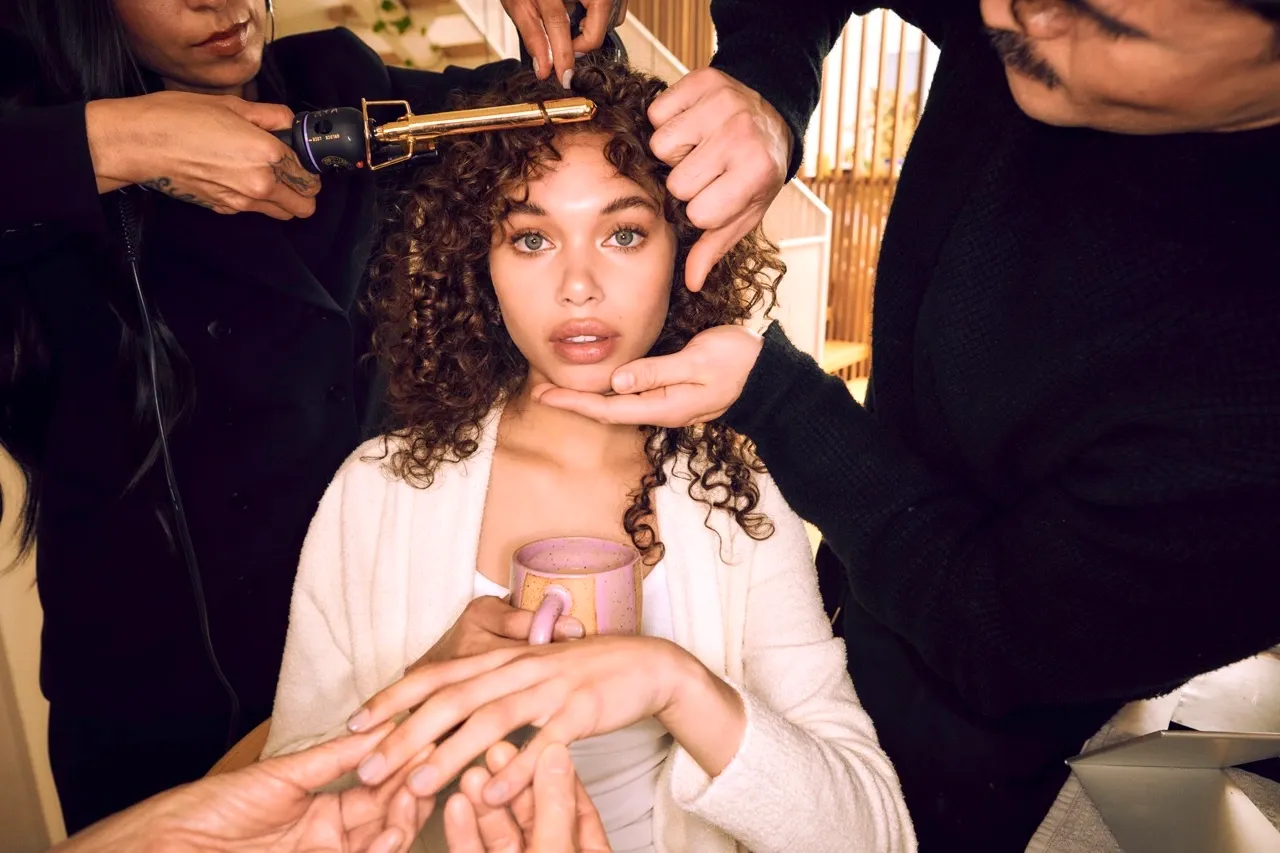
Professional nail technicians have lots of experience painting crisp French tips quickly and perfectly. When you go to a salon, you’re also getting the full pedicure experience: a thorough foot cleaning, callus care, massage, and perfectly applied polish. If you decide to book a French pedicure service at a salon or spa, you’ll likely end up with ultra-neat white lines and a high-shine finish that may be hard to replicate at home. Professionals also have access to specialized curing lights, high-quality polishes, and techniques that result from extensive training. Another benefit is time. A nail tech can probably do a French pedi faster than you can, and you can relax during the process. If you have a special occasion (such as a wedding, vacation, or event) and you want perfect toes, it might be worth getting a salon French pedicure to ensure top-notch results.
A French pedicure is truly the ultimate classic when it comes to toe grooming. It’s elegant, clean, and works for every occasion. Now that you’ve read this comprehensive guide, you know how to get the perfect French pedicure step by step, what tools and products make the job easier, and all the creative ways you can customize the look to fit your personality. Whether you opt for the timeless white tips or spice it up with colors and sparkle, the French pedi style offers a beautiful canvas for your toes. It’s easy to understand why this trend endures: done well, a French pedicure makes your feet look impeccably neat and subtly stylish.
Ready to book your next appointment?
Book NowMaintenance and Aftercare
To keep your French pedicure looking fresh and flawless, adopt a simple daily maintenance routine. Moisturize your feet and cuticles regularly to prevent dryness and cracking, which can cause polish to chip. Apply a clear top coat every few days to maintain shine and protect the polish from wear. Whenever possible, wear open-toed shoes to avoid scuffing the tips, and limit prolonged soaking in hot water, as this can cause the polish to lift. If you notice minor chips or dullness, quickly refresh your pedicure by touching up the white tips and adding a new layer of top coat.
Frequently Asked Questions
Even with careful application, a French pedicure can present a few challenges. Here are answers to the most common questions to help you decide if this timeless style is right for you, and solutions to the most common problems, so you can fix mistakes quickly and keep your toes looking flawless.
How long does a French pedicure last?
A French pedicure with regular polish usually lasts one to two weeks. Gel versions can last up to three or four weeks with proper care.
Is a French pedicure suitable for short toenails?
Yes! A skilled technician can create a neat, subtle French tip on short nails, often using a thinner line for a refined look.
How much does a French pedicure cost?
Prices vary by location and salon, but a French pedicure typically costs slightly more than a standard pedicure due to the detailed tip work.
Are French pedicures still in style?
Absolutely. French pedicures remain a classic, versatile choice and are frequently updated with modern twists like colored tips or minimalist designs.
Can men get a French pedicure?
Yes. French pedicures offer a clean, natural look that works well for anyone seeking well-groomed feet, regardless of gender.
What’s the difference between a French and American pedicure?
A French pedicure features a bright white tip and pink base. An American pedicure uses softer, off-white tips and a more natural, beige-toned base.
Can I do a French pedicure at home?
Yes, with the right tools and patience, you can achieve salon-quality results at home by following a step-by-step guide.
What if my toenails are prone to chipping?
Use a quality top coat and reapply it every few days. Avoid soaking your feet in hot water for long periods to help your pedicure last.
My white tips look uneven or lopsided. What can I do?
Use a fine nail brush dipped in polish remover to gently clean up and reshape the line. For future pedicures, try guide strips or nail tape for a crisp, even tip.
The polish on my toes smudges before it dries. How do I fix this?
If the polish is still wet, smooth the smudge with a damp brush. For dry smudges, lightly buff the area and reapply polish. Always allow ample drying time between coats.
The white tip polish streaks or looks patchy. Any solutions?
Apply two thin coats of opaque white polish, letting each layer dry completely. If streaks remain, use a high-opacity formula and avoid overloading the brush with polish.
My French pedicure chips or peels quickly. How can I prevent this?
Seal your pedicure with a quality top coat, and reapply it every few days. Avoid soaking your feet in hot water for long periods, and wear open-toed shoes as much as possible.
The smile line on my tips is too thick or too thin. How do I correct this?
Clean up excess polish with a small brush dipped in remover. Practice painting the line with a detail brush, or use tip guides to control the thickness for your preferred look.
I got polish on my skin or cuticles. What’s the best way to clean it up?
Dip a cotton swab or small brush in remover and carefully wipe away any stray polish from your skin and cuticles while it’s still wet for a neat finish.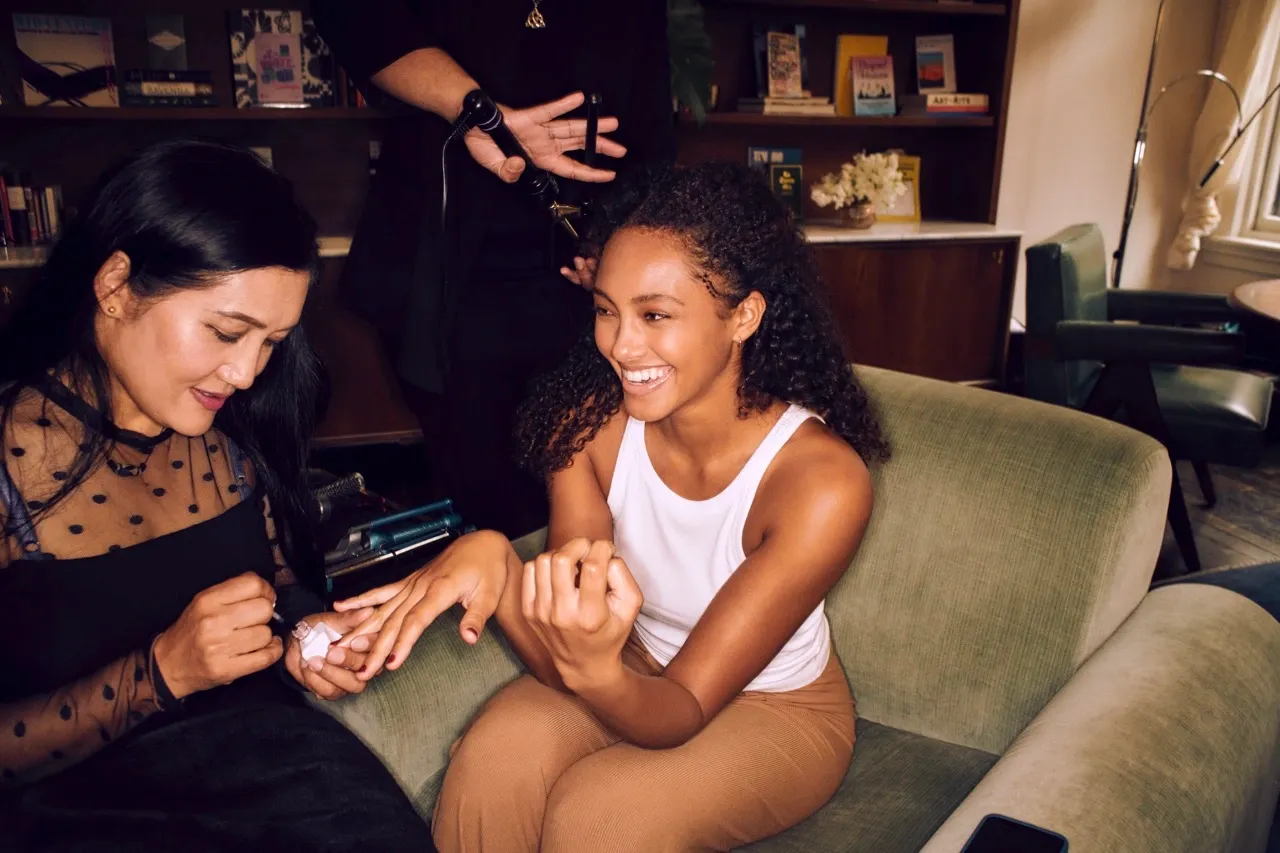
For those in the U.S. who want a professional touch, you can always book a session with a nail technician or opt for an at-home service like Glamsquad to enjoy a flawless French pedicure without lifting a finger. And if you prefer the DIY route, with a little practice and patience, you’ll be painting crisp French polish on toes like a seasoned pro. Remember the key takeaways: prep your nails thoroughly, use thin coats of polish, and don’t rush the drying. Also, don’t be afraid to get creative. The French pedicure is a versatile look that welcomes innovation, whether it's a black French pedicure for a trendsetting vibe or adding tiny designs for a personal touch.
Sources:
- whowhatwear.com Who What Wear – Celebrity nail artist on the comeback of French pedicures and modern “micro French” style (2025)
- byrdie.com Byrdie – French pedicure expert tips on tools needed for a perfect at-home French pedi (2022)
- realsimple.com Real Simple – Hot pink French pedicure described as a playful, modern twist that still looks crisp and clean (2024)